 A wide variety of teams and organizations use an agile methodology to manage and complete their projects. Although it was originally developed for software development teams, the agile methodology has taken off. Flexible and customizable tools, like Asana make this possible. Read on to learn how to create and maintain agile projects in Asana.
Recommended article: 97 percent of companies now use agile development methods
Important Terms to Know
Asana is a Kanban tool you can use quickly and easily for agile planning. However, the terminology in Asana is a bit different than what you might be used to for agile. The breakdown below can help you understand how Asana and agile terms correlate.
| Asana | Agile |
|
Portfolio — a dashboard for your entire project. It enables you to group and monitor related projects.
|
Epics — entire projects or major versions |
| Project — an individual kanban board. It is contained within a portfolio or epic. | Feature — an individual aspect or function of your project. Features define what your project is supposed to do.
Backlog — an accumulation of stories or tasks that are pending. Any items you are unable to complete during a sprint go to the backlog. Sprint — a set time period or iteration. You work on a set amount of stories or tasks during each sprint. |
|
Tasks — an individual Asana card within a project. It can be tied to multiple projects.
|
Stories — granular aspects of a feature. Stories are defined by customer needs and requests. |
|
Subtasks — a granular part of a task. It enables you to break stories into workable parts assigned to different team members.
|
Tasks — individual components of stories. |
Note that the above agile terms can be applied to any project management environment, while the Asana terms are applicable only to Asana projects.
How to Build an Agile Project in Asana
- Create a new team from the sidebar on the left of the dashboard.
- After selecting Add Team you can enter your team name, invite members, and set team permissions.
- You can adjust permissions later via Team Settings if you need to.
- If you need to provide customers access to projects or epics you can allow them to join as Organization Guests or as members with comment-only access.
- Create a new portfolio from the sidebar on the left by clicking Portfolio.
- Once you are on the portfolio screen you can save a default portfolio view using the Settings sliders in the upper right-hand corner.
- If you need to change who your portfolio is shared with, use the Person icon in the upper right-hand corner. From the pop-up, you can add or remove members as needed.
- Create a new project using the orange + button on the right of the top toolbar.
- There are pre-made templates you can use or you can create a project from scratch. If you decide to create one from scratch, you can turn it into a template. You can create a new template from the arrow drop-down next to your project name.
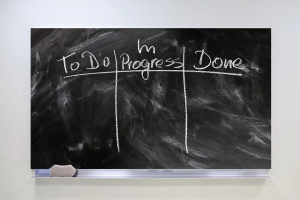
- Name your columns according to need.
- Columns typically include Ready, In Progress, Pending Approval, Blocked, or Done.
- To create a backlog, you can create an individual backlog project or simply add a Backlog column to your feature project.
- You can add custom fields for your story tasks from the Fields link at the top right of your project toolbar. Example uses for these fields include, tracking feature size, cost, time to finish, or business goals.
- Create new story tasks by clicking the white + button at the top of your project columns.
- You should title the task with the name of the story or the step to be taken. You can then add acceptance criteria, links, or other relevant info to the individual story card.
- Once a card is created, you can assign it to a responsible party along with a due date.
- You can also leave stories unassigned for a team member to claim when available.
- If you need to break stories into smaller pieces, you can do so with subtasks. Subtasks are created from within the story card using the + Add subtask
- Create a sprint project in the same way you created feature or backlog projects.
- Once created, you can add stories from features to your sprint by adding the sprint project in individual story task cards.
- Assigning story tasks to multiple projects enables you to update stories simultaneously across sprint and feature projects.
- When it’s time for your next sprint, you can duplicate the current sprint as a base to be updated and then archive the now completed sprint. Archiving enables you to track completed sprints while assuring that only new sprints are worked on.
Tips for Using Asana
After you create your epic and its components, you’re ready to start using Asana to track and direct your workflows. The following tips can help you refine your workflow processes and get the most out of the features that Asana offers.
Export Project Data
You can export data in CSV or JSON format. Once exported, this data can be imported to other tools for use in reporting or for agile metrics.
Recommended article: 10 Powerful Agile Metrics – and 1 Missing Metric
Use Task Templates
You can create template tasks to identify what information needs to be added to new tasks and stories. To create a template, create a new task and fill it out with clear example fields such as [Example Title] or **doc link**. Users can then duplicate this task from the […] button in the upper right corner of the card and replace the filler information.
Take Advantage of Custom Fields
You can filter tasks and prioritize issues based on your custom fields. You can filter from the Filter icon in the top right of your project toolbar. You can sort tasks according to custom fields via the Sort icon next to the Filter icon.
Use Centralized Project Information
You can add attachments to your story tasks to simplify how you share information and materials. You can also use the Progress or Timeline views to visualize workflow and story progression.
Conclusion
Hopefully, this article helped you understand how you can use Asana to manage your agile projects. The process covered here can help you create a standard plan and ensure that the fundamental aspects of your project are covered.
To add functionality to Asana, and fully incorporate all pieces of your workflows, you should check out available integrations. There are many options available to you from a variety of third-parties, including time tracking and reporting. Take the time to evaluate your options and don’t be afraid to demo integrations to find the right ones for you.
Leave A Comment